
這篇教學透過 Django 實作建立一個陽春部落格。透過 Django Framework 指令快速構建網站框架。
透過簡單的專案體驗 Django 的基本功能。
版本需求
Python 3.12
Django 4.2 LTS
Conda 24.5.0
1. 建立虛擬環境
1 | conda update conda |
小提示
當然也可使用 conda update --all 進行更新,相對時間會比較久。
使用以下指令建立虛擬環境 (Python 會自動使用 conda 預設版本)
Note: 當虛擬環境名稱重複時,將會刪除就舊的環境並重新建立
1 | # conda create --name (虛擬環境名稱) python=(python 版本) |
注意
當初現以下提示訊息時,表示您的 conda 尚未初始化 (conda init)
1 | CommandNotFoundError: Your shell has not been properly configured to use 'conda activate'. |
啟用虛擬環境,之後下載 Python 套件都會存放於對應的虛擬環境之下,避免套件相依性的干擾問題。
1 | # conda activate (虛擬環境名稱) |
不確定虛擬環境名稱時,可以透過以下指令進行查詢:
1 | conda env list |
當成功進入虛擬環境時會顯示虛擬環境名稱在指令前綴,如:
1 | (django_env) C:\Users\wycha> |
小提示
離開虛擬環境的指令如下:
1 | # conda deactivate |
檢查虛擬環境內的 Python 路徑位置:
1 | where python |
輸出狀況 (檢查預設 Python 路徑指向 ...\anaconda3\env\(虛擬環境)\python.exe):
1 | (django_env) C:\Users\wycha>where python |
2. 虛擬環境安裝 Django 套件
以下開始的指令需要進入虛擬環境執行 (conda activate (虛擬環境名稱))。
透過 pip 安裝套件:
1 | # pip install (套件名稱)(版本條件運算子)(版本號碼) |
您需要知道
conda 本身也具有套件管理的功能,但是下載 packages 的來源地址由 anaconda 維護。
使用 conda 下載套件的版本資訊可以在 https://anaconda.org/conda-forge/repo 查詢,
pip 套件管理則由 PyPA 維護,套件資訊可在 https://pypi.org/ 查詢。
簡而言之,conda 環境打包出來的 packages 是適用於 conda 環境 (conda 可以建構非 python 語言環境或其他 shell scripts),pip 的 packages 適用於安裝套件於 python 環境,兩種套件管理器的出發目的不一樣,所以 packages 提供的版本也不盡相同。又 conda 可以建立 python 環境所以 pip 可以針對 conda 中 python 進行安裝。因此使用上 conda 與 pip 是不衝突的。
按照 django 狀況為例, conda 提供的版本為 4.1,pip 提供的版本為 4.2.*,因此採用 pip 進行套件安裝。
執行結果
1 | (django_env) C:\Users\wycha>pip install django==4.2 |
3. django-admin 初始化專案
請根據自己的桌面路徑執行以下程式碼:
1 | cd %HOMEDRIVE%%HOMEPATH%\Desktop |
確保專案資料夾建立於桌面
1 | # django-admin startproject (專案名稱) |
1 | # code (專案資料夾的路徑) |
方便後續開發流程,讓 VScode 開啟時可以自動載入虛擬環境。
在檔案總管的空白處新增資料夾
.vscode並且在該資料夾內建立settings.json新增以下程式碼至
settings.json1
2
3
4
5{
"python.terminal.activateEnvironment": true,
"python.defaultInterpreterPath": "~\\anaconda3\\envs\\django_env\\python.exe",
"terminal.integrated.defaultProfile.windows": "Command Prompt",
}Ctrl + Shift + P 輸入
Developer: Reload Window按下 Enter 重新啟動 VSCode
4. 管理程式 manage.py 構建 app
Ctrl + ` 開啟 VSCode 內的終端機,先檢查終端機是否自動進入虛擬環境,即終端機輸入開頭出現 (django_env)。
接著輸入以下指令建立新的 web app:
1 | # python manage.py startapp (APP 的名字) |
接著,啟動【測試】伺服器:
1 | # python manage.py startapp (APP 的名字) |
小提示
在終端機介面按下 Ctrl + C 停止測試伺服器
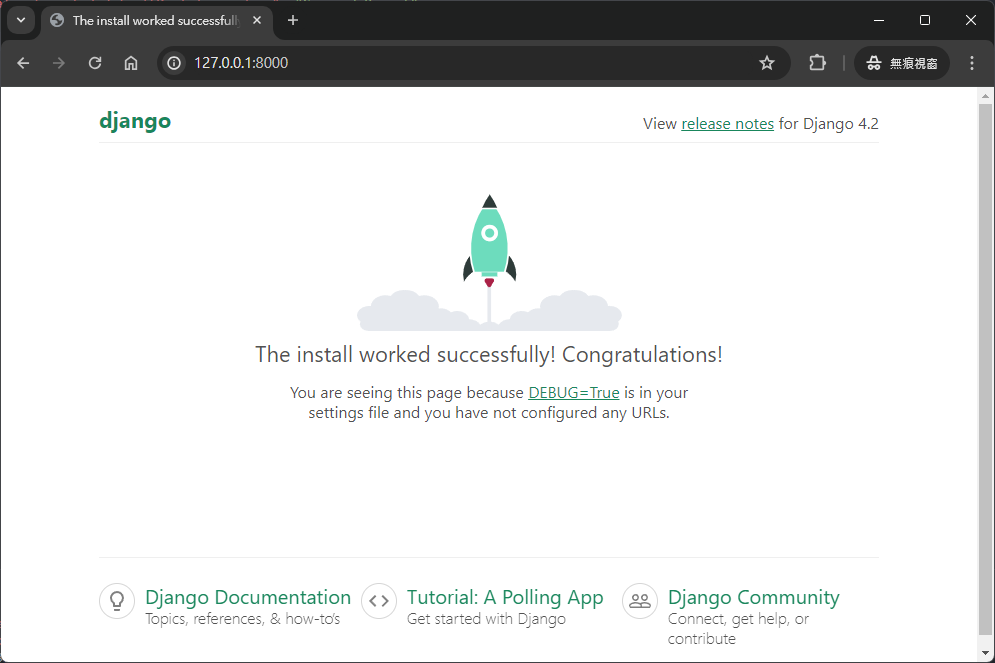
開啟瀏覽器連接上 http://127.0.0.1:8000/ 將會看到 django 初始化面,如下圖:
而按照指令所產生的資料夾結構如下:
djangoBLOG 資料夾結構
1 | │ db.sqlite3 |
5. 修改 Django 框架的設定
1 | # line:28 |
- Line 28:
ALLOWED_HOSTS設定允許連線的來源 - Line 106:
LANGUAGE_CODE網站的預設語言。 - Line 108:
TIME_ZONE網站的時區 - Line 40:
INSTALLED_APPS啟用的 APP 清單注意
這邊的INSTALLED_APPS是一個 python list 的型態,因此每個元素需要加上逗點分隔。
6. 定義資料模型 Models
構建一個 CMS(Content Management System) 系統,最重要的部分就是將資訊內容儲存於資料庫裡,方便後續維戶與更新。而 Django 框架提供 ORM(Object Relational Manager) 方式將資料庫邏輯構建成物件導向式的程式碼型態,可以節省開發人員維護資料庫結構的時間。
- 接下來我們真的 APP 裡面
models.py程式碼進行修改:
1 | from django.db import models |
讓資料模型生效需要執行以下指令:
1
2python manage.py makemigrations
python manage.py migrate執行結果
執行結果 1
2
3
4
5
6
7
8
9
10
11
12
13
14
15
16
17
18
19
20
21
22
23
24
25
26
27(django_env) C:\Users\wycha\OneDrive\桌面\djangoBLOG>python manage.py makemigrations
Migrations for 'blog_post':
blog_post\migrations\0001_initial.py
- Create model Post
(django_env) C:\Users\wycha\OneDrive\桌面\djangoBLOG>python manage.py migrate
Operations to perform:
Apply all migrations: admin, auth, blog_post, contenttypes, sessions
Running migrations:
Applying contenttypes.0001_initial... OK
Applying auth.0001_initial... OK
Applying admin.0001_initial... OK
Applying admin.0002_logentry_remove_auto_add... OK
Applying admin.0003_logentry_add_action_flag_choices... OK
Applying contenttypes.0002_remove_content_type_name... OK
Applying auth.0002_alter_permission_name_max_length... OK
Applying auth.0003_alter_user_email_max_length... OK
Applying auth.0004_alter_user_username_opts... OK
Applying auth.0005_alter_user_last_login_null... OK
Applying auth.0006_require_contenttypes_0002... OK
Applying auth.0007_alter_validators_add_error_messages... OK
Applying auth.0008_alter_user_username_max_length... OK
Applying auth.0009_alter_user_last_name_max_length... OK
Applying auth.0010_alter_group_name_max_length... OK
Applying auth.0011_update_proxy_permissions... OK
Applying auth.0012_alter_user_first_name_max_length... OK
Applying blog_post.0001_initial... OK
Applying sessions.0001_initial... OK
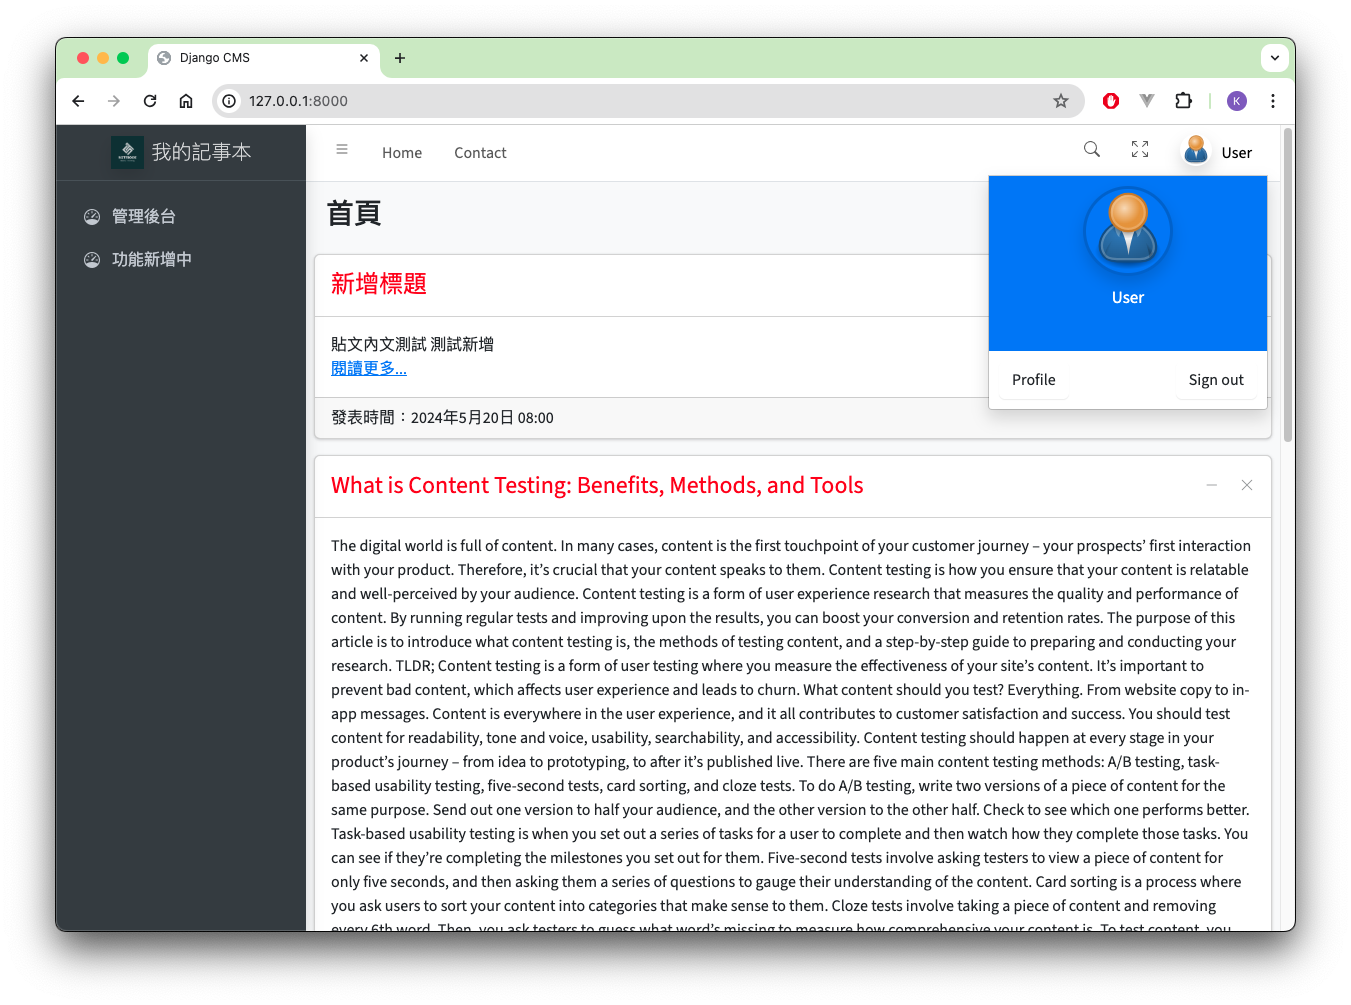
7. 啟用管理介面並新增資料
Django 框架有提供後台管理介面給開發者使用,除了有使用者帳號模組以外,也包含資料庫管理模組於其中。啟用 admin 功能時需要建立超級使用者的使用者帳號密碼。
透過指令建立超級使用者
1
python manage.py createsuperuser
按照提示訊息進行輸入:
1
2
3
4
5
6
7使用者名稱 (leave blank to use 'wycha'): admin
電子信箱: admin@django_example.com
Error: 請輸入有效的電子郵件地址。
電子信箱: admin@djangoexample.com
Password:
Password (again):
Superuser created successfully.注意
- 使用者名稱為登入後台的帳號。
- 電子信箱可以使用假信箱作為替代,不過如果後須會使用到 email 發信功能時,請輸入正常使用中的 email 地址
- 終端機的系統互動介面 Password 欄位,基於安全性在輸入的時候不會有任何反應。
- 當然這些資料都可以在後台進行修改
將 APP 納入管理後台的程式中
1
2
3
4
5
6
7from django.contrib import admin
from blog_post.models import Post
# Register your models here.
admin.site.register(Post)- Line 2: 表示將會使用到 APP.
models中的PostClass。 - Line 6: 使用
django.contrib中的adminClass,並把託管的 model 以參數形式傳入。
- Line 2: 表示將會使用到 APP.
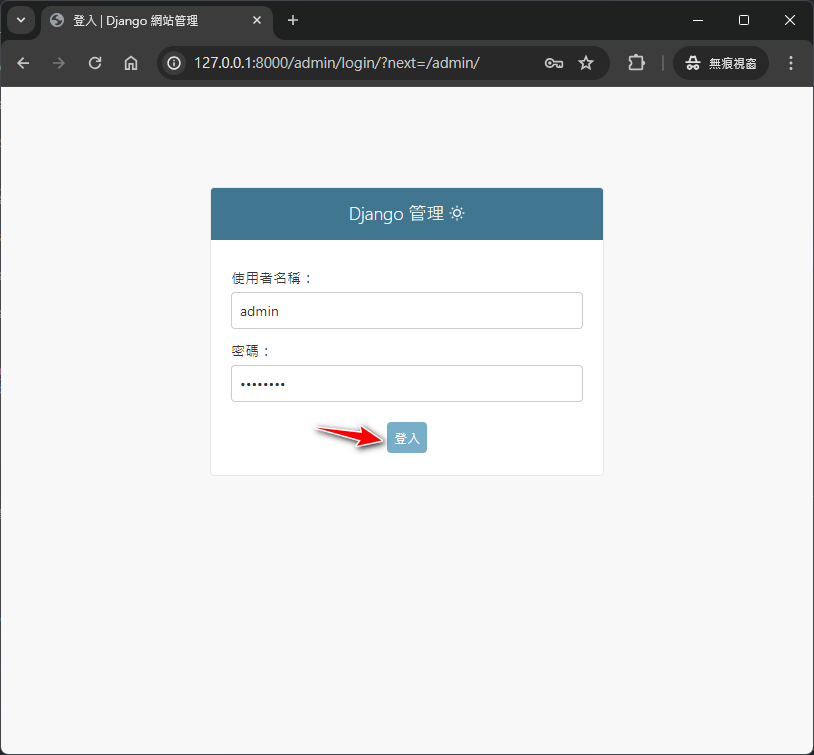
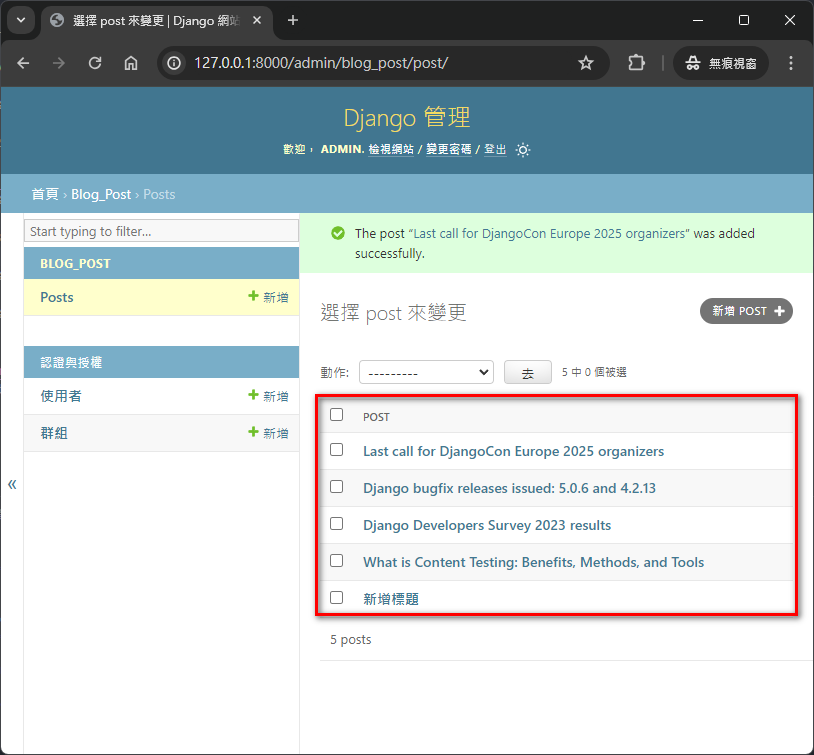
進入後台並嘗試操作資料庫管理介面
1
python manage.py runserver
- 打開瀏覽器
- 輸入 http://localhost:8000/admin
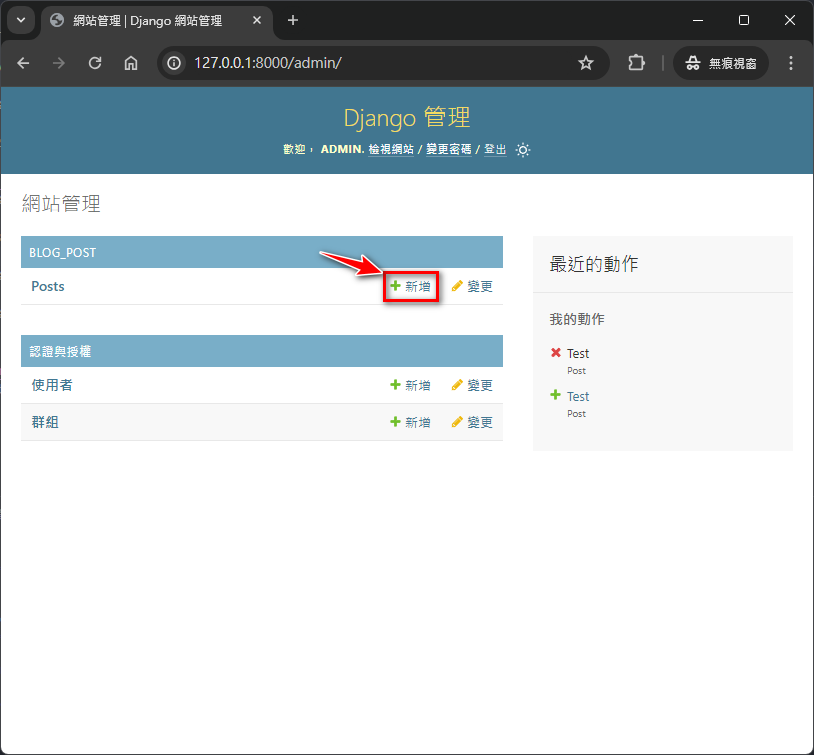
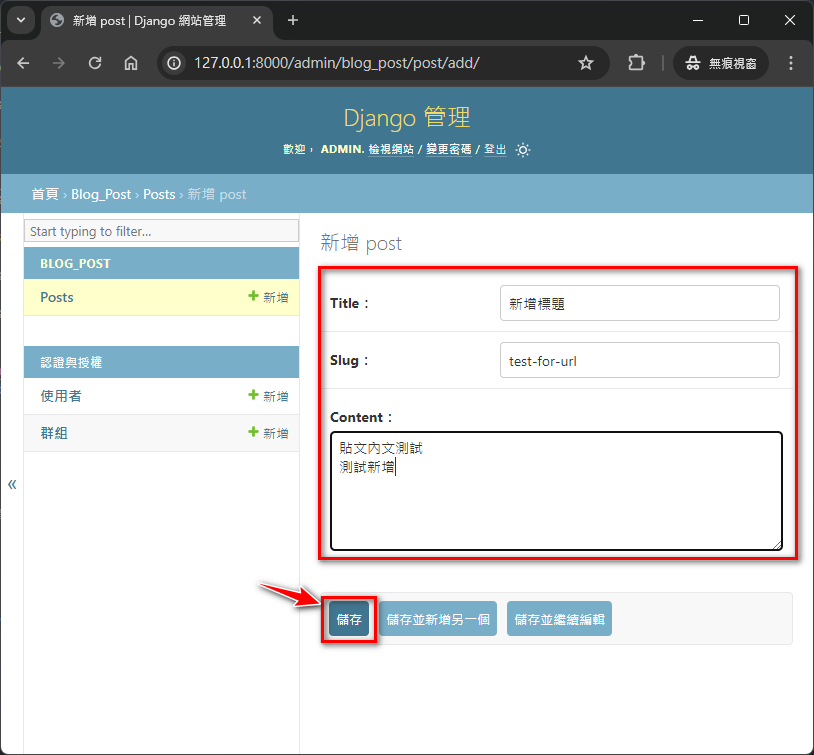
注意
Slug欄位是作為文章的網址的資料,此欄位資料不重複、限定英文小寫與減字號 (-)、底線 (_) 符號,其餘字元盡量不要使用,特別是中文。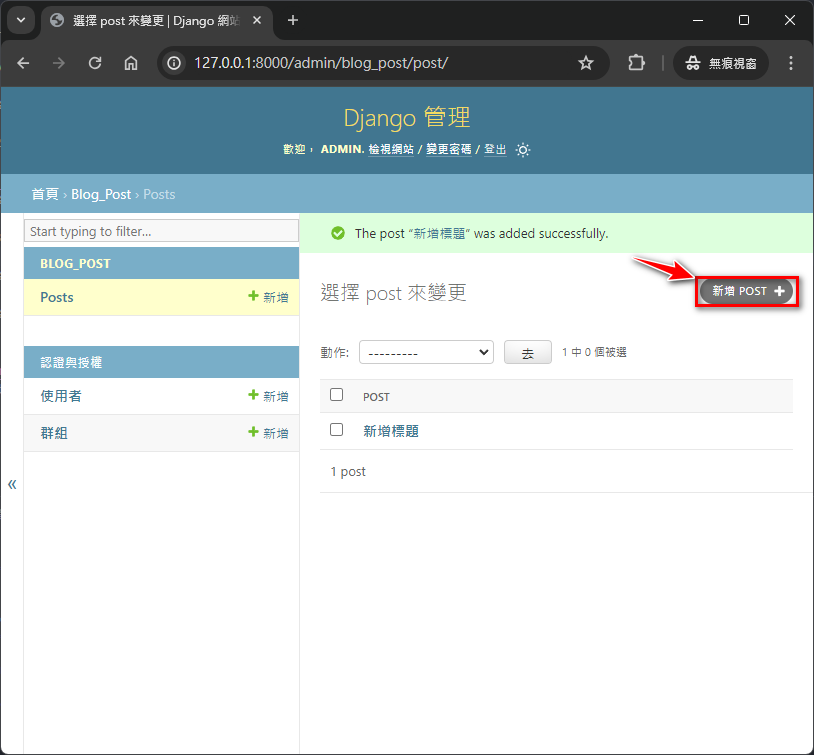
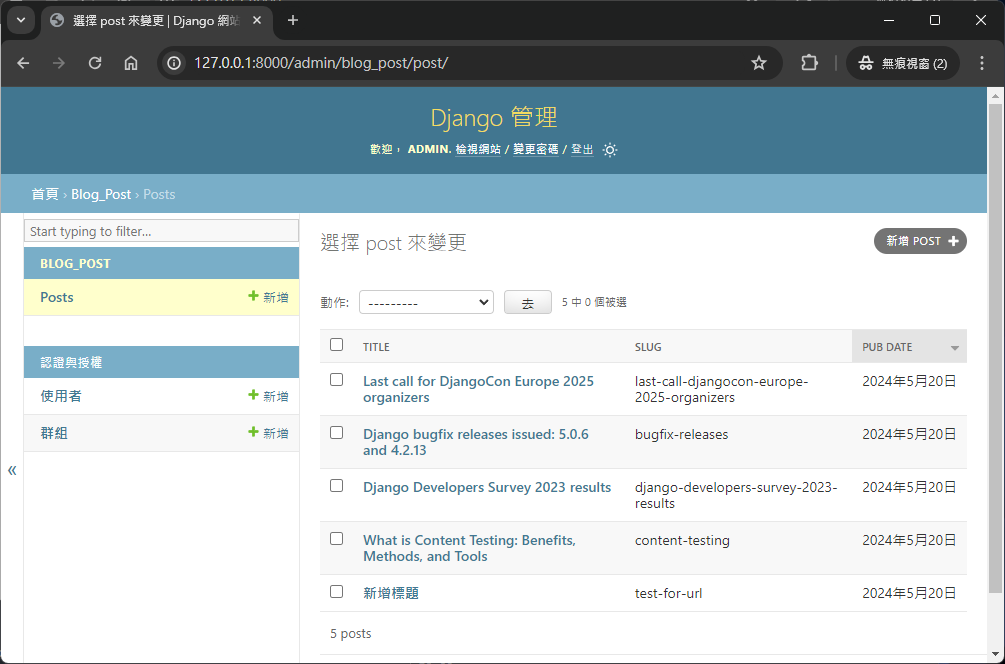
讓 admin 介面中的顯示其他欄位於總表上 (修改 )
專案資料夾/blog_post/admin.py 1
2
3
4
5
6
7
8
9
10
11
12from django.contrib import admin
from blog_post.models import Post
# Register your models here.
class PostAdmin(admin.ModelAdmin):
list_display = ['title', 'slug', 'pub_date']
admin.site.register(Post, PostAdmin) # 修改- Line 8: 新增
PostAdminClass 繼承自admin.ModelAdmin並定義屬性list_display。 - Line 11: 將
PostAdminClass 作為第二參數傳入admin.site.register方法內
- Line 8: 新增
8. 修改首頁並讀取資料庫內的資料
這節次開始我們開始嘗試把資料庫的資料讀取並顯示於指定網址。
編輯 APP 的 views.py
專案資料夾/blog_post/views.py 1
2
3
4
5
6
7
8
9
10
11
12
13
14from django.shortcuts import render
from django.http import HttpResponse
from blog_post.models import Post
# Create your views here.
def index(requests):
posts = Post.objects.all()
post_lists = list()
for count, post in enumerate(posts):
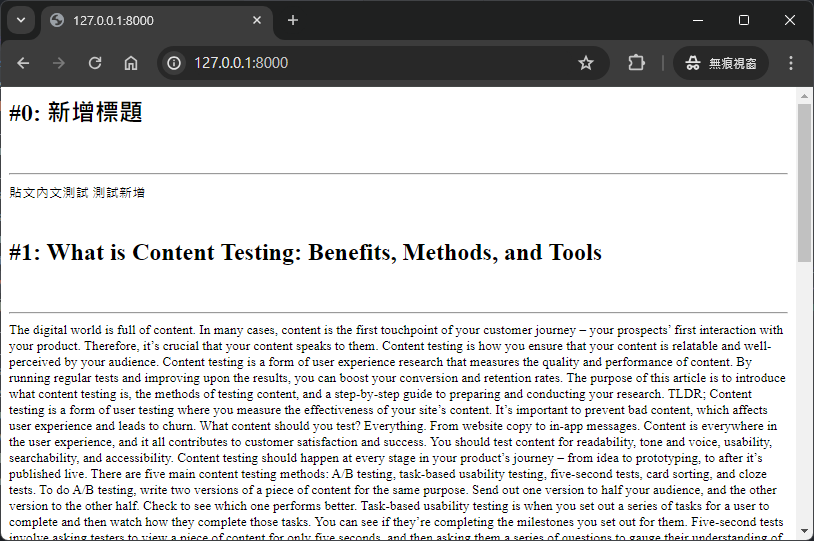
post_lists.append("#{}: {}<br><hr>".format(str(count), str(post)))
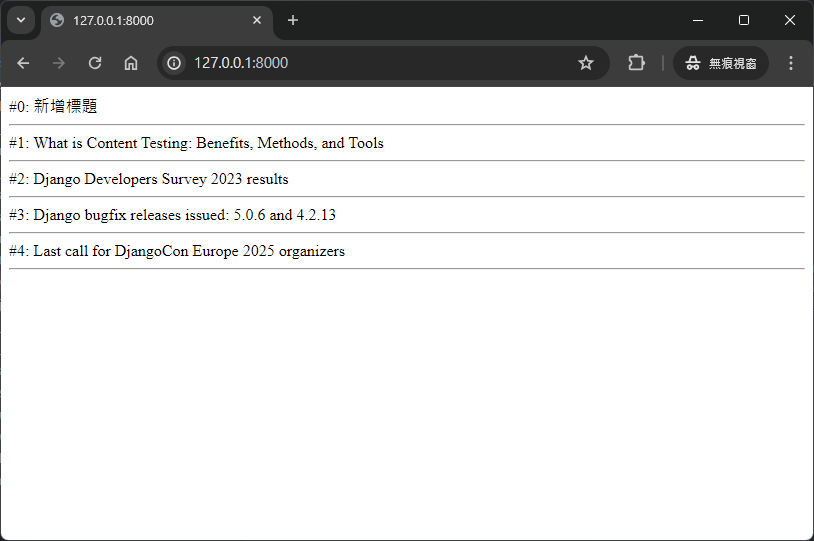
return HttpResponse(post_lists)- views.py 為這個 APP 的視圖集合,裡面定義頁面呈顯方式,其中:
- Line 3: 預先載入資料模型
PostClass。 - Line 8: 定義視圖方法。作為視圖方法必須帶有
requests參數。 - Line 9: 使用
model的查詢方法Post.objects.all - Line 13: 使用
HttpResponse將資料回傳
- Line 3: 預先載入資料模型
- views.py 為這個 APP 的視圖集合,裡面定義頁面呈顯方式,其中:
定義網址對應執行的視圖方法
專案資料夾/DjangoBLOG/urls.py 1
2
3
4
5
6
7
8
9from django.contrib import admin
from django.urls import path
from blog_post.views import index
urlpatterns = [
path('', index),
path("admin/", admin.site.urls),
]- urls.py 這一支程式存在於
settings.py同一層資料夾內,也表示一個專案裡面只有一個「根」urls.py,當伺服器接收到請求時,會優先使用這個urls.py比對請求網址與對應的執行方法。 - Line 3: 對應的視圖方法使用時要先載入
- Line 6: 定義網址為
''時對應執行的方法。''表示base_url後面沒有其他內容,即 http://localhost:8000/。 - Line 7: 定義網址為
admin/時對應執行的方法,即 http://localhost:8000/admin/。這邊為了維護方便採用嵌套路由作為對應執行方法,後續章節會詳細講解其原理。
- urls.py 這一支程式存在於
當修改完上面兩個部份的程式碼後打開瀏覽器並連上 http://localhost:8000/ 畫面如下:
顯示文章內容 ➞ 修改
blog_post/views.py::index()專案資料夾/blog_post/views.py 1
2
3
4
5
6
7
8
9
10
11
12
13
14
15from django.shortcuts import render
from django.http import HttpResponse
from blog_post.models import Post
# Create your views here.
def index(requests):
posts = Post.objects.all()
post_lists = list()
for count, post in enumerate(posts):
post_lists.append("<h2>#{}: {} </h2><br><hr>".format(str(count), str(post))) # 修改
post_lists.append("<small> {} </small><br><br>".format(str(post.content))) # 修改
return HttpResponse(post_lists)- 修改 Line 12: 加入
<h2>與<hr>HTML 標籤讓標題格式化。 - 修改 Line 13: 用
post.content取得資料庫文章內容插入<small>標籤中
- 修改 Line 12: 加入
9. 將頁面模板化
在上一個節次我們將資料渲染出來,但實務上頁面組成可能還會包含其他區塊,如:標題、橫幅、側欄、頁尾…等,如果全部把它放在 views.py 內會讓程式碼顯得雜亂,因此我可以運用 Django Views 與 Templates 架構進行程式碼拆分,讓 View 專注於資料儲存、邏輯操作, Templates 負責根據資料渲染畫面。
9.1. 在 Django 使用模板 (Template) 設定
1 | mkdir templates |
1 | TEMPLATES = [ # 約 54 ~ 55 行 |
9.2. 在指定 Templates 資料夾新增模板 index.html
1 | <html> |
- Line 9 與 11 中的
{{}}為渲染記號,Django 會填充對應的變數資料於指定的位置 (記號內為變數名稱)。
9.3. 修改 views.py 並指定使用的模板
1 | from django.shortcuts import render |
- Line 4: 使用
datetimepackage 取的當前伺服器時間。 - Line 11: 新增
now變數儲存當前時間字串。 - Line 12: 使用
render()將資料與模板進行渲染。render()第一個參數為requests來自傳進方法的requests。render()第二個參數為使用的模板路徑 + 檔案名稱。render()第三個參數為模板渲染的字典型態的資料。locals()會將當前方法內之變數與值打包成字典。
渲染結果
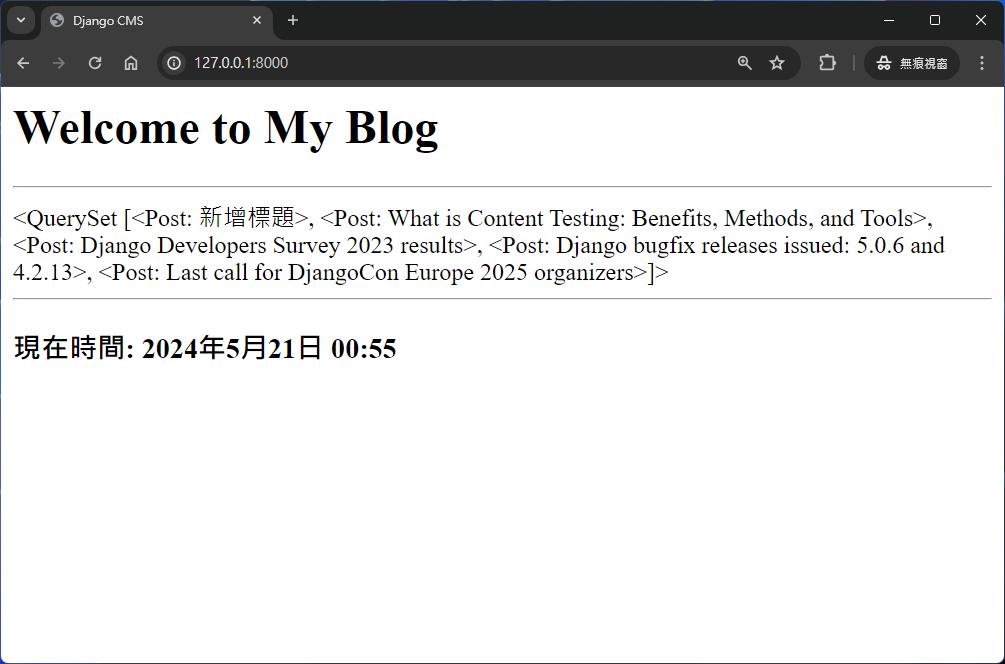
9.4. QuerySet 渲染與排版調整
從 9.3 的渲染結果來看,<body> 中 {{ posts }} 是以 QuerySet 的物件顯示在渲染標記處。而 QuerySet 是由 ORM 產生的查詢結果。因此我們需要在模板內使用特定的模板語言進一步處理 QuerySet。
1 | <html> |
Line 25 ~ 29:
{% for %} ... {% endfor %}是模板語言裡的迴圈,會重複「渲染」迴圈內的 html 標籤。- 模板內使用
{% ... %}表示使用模板語法,語法使用與範例將會在後面教學文章進行示範。
- 模板內使用
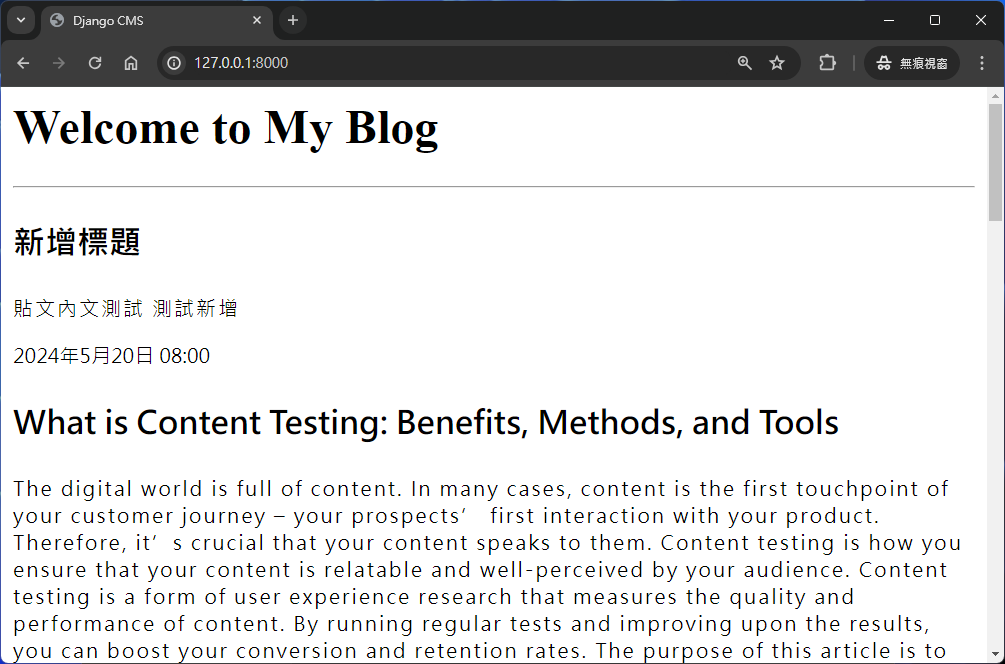
Line 6 ~ 19: 為 CSS 語法,將
<p>依照不同的 class 進行格式調整。
渲染結果
10. 精簡首頁內容並製作超連結
一般來說首頁通常不會顯示太多內容,而是會做成類似入口的形式,提供使用者按照自己所需瀏覽資訊。
因此我們可以只保留標題,並將其作為超連結。
10.1. 精簡首頁為超連結
1 | <html> |
- Line: 6 ~ 10: 將
<p class="post_title">以外的標籤移除,並且以<a>標籤包起來。 - Line 7: 其中
<a>的href內使用{{post.slug}}作為超連結各文章的專屬位址。
10.2 新增 post.html 渲染單一文章內容
新增模板 post.html 在 專案資料夾/templates/ 底下,內容如下:
1 | <html> |
- 內容基本上與
index.html差不多。 - Line 22 ~ 28: 原本是用
{% for %}將 QuerySet 渲染,這邊改寫成直接將資料渲染。
10.3. 修改 urls.py 將 slug 作為 url 的參數進行傳遞
定義超連結的路由資訊:
1 | from django.contrib import admin |
- Line 3: 加入新的
showPost方法 (尚未實現因此可能會出現錯誤)。 - Line 8: 定義新的連結
post/<slug:slug>/,其中<slug:slug>表示參數該字段是來自超連結的參數。<slug:slug>中的第一個slug是參數的型態。<slug:slug>中的第二個slug是參數的名稱。
10.4. 新增 showPost 方法於 blog_post\views.py
1 | from django.shortcuts import render, redirect |
- Line 1: 引入 django 內建的重新導向方法
redirect。 - Line 5: 引入 django 例外處理的 Class
ObjectDoesNotExist當 model 查詢不存在的 keys 時會回傳此例外。MultipleObjectsReturned當 model 查詢的 keys 大於一筆時,回傳此例外。
- Line 9 ~ 16:
showPost主方法- 其中以
try ... excepy...語法實現。 - 只要接收到錯誤時就將頁面轉址回首頁。
- 其中以
渲染結果

11. 共用模板
觀察 index.html 與 post.html 程式碼部分只有在 <body> 裡面有些微的差異,因此我們可以將重複性高的區塊獨立出來,進一步使用模板繼承的技巧,抽象化成單一文件方便後續維護與使用。
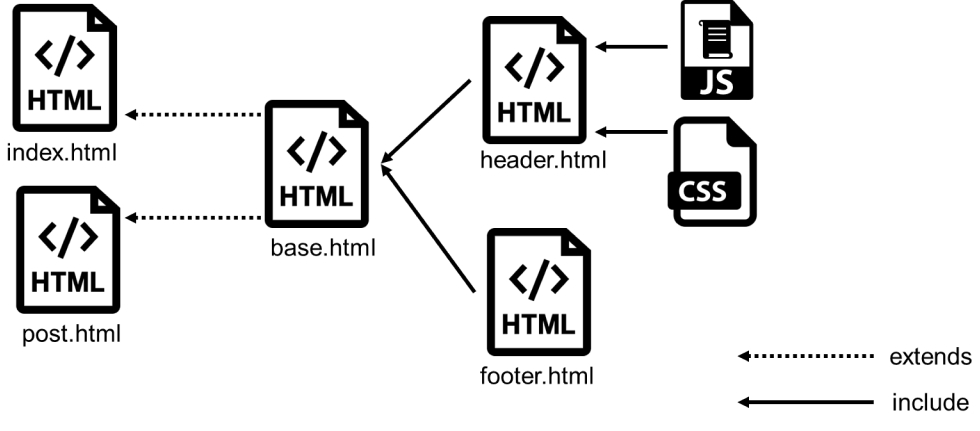
- 以上圖為例子,
index.html中可以拆解成header.html、footer.html、navbar.html… 等區塊。這些區塊用單一檔案進行撰寫與維護。 - 模組與模組之前可以使用 include 將程式碼導入。
- 當然也可以透過 include 方式組成 scaffolds (鷹架),如上圖的
base.html。 - 而內容差異不大的頁面則採用 extends 方式將資料填充到 scaffolds 形成一個新的頁面 page。
11.1. 在 templates 資料夾按照功能性建立資料夾
1 | mkdir templates\components |
components存放組件,如:header.html、footer.html、navbar.html。scaffolds存放組合出來的架構,提供給pages繼承。pages則用來收納透繼承而產生的檔案,提供給 views 渲染模板。
11.2 在 components 資料夾內新增 header.css.html
把 post.html 與 index.html 的 CSS 區塊獨立成單一檔案。
1 | <style> |
11.3 在 components 資料夾內新增 footer.html
1 | {% if now %} |
11.4 在 scaffolds 資料夾內新增 base.html
1 |
|
- Line 6、11、13與18:
{% block title %} ... {% endblock %},這邊使用到模板語言的block意思為,我們在base.html保留一個插槽讓,繼承的檔案進行區塊填充,而block模板語言的第二參數為區塊名稱。 - Line 8、15:
{% include 'components/footer.html' %}使用include將指定路徑檔案的程式碼,複製並填充到include所在的區塊。
11.5 在 pages 資料夾內新增 index.html 與 post.html
1 | {% extends 'scaffolds/base.html' %} |
1 | {% extends 'scaffolds/base.html' %} |
- 仔細比較兩個檔案與
base.html,不難看出base.html是用{% block %}預留區塊,而被繼承下來的index.html與post.html檔案組就就是針對預留區塊進行賦值。
11.6 修改 blog_post/views.py 內 index() 與 showPost()
1 | def index(requests): |
- 修改
render()中的模板位址,讓 Django 使用templates/pages資料夾內的模板進行渲染。
12. 靜態檔案處理
通常一個網站包含許多圖片內容豐富我們的版面,當然也會根據專案不同會設計自己的樣式如 css 檔案,甚至在應用程式有特定的 UI 操作流程需要撰寫 javascript 讓使用者可以在應用程式中進行互動。上述這些檔案實際上不會因為使用者不同,檔案內容而有所改變,而這些檔案就可以視為靜態檔案。
後續實作將會使用到一張圖片,請先自行準備,圖檔的用途作為 logo 使用。
Logo Maker: https://www.designevo.com/tw/logo-maker/
12.1. 設定 static 資料夾
1 | mkdir static |
12.2. 建立檔案用於測試靜態文件載入
- 將 logo 拖曳至
專案資料夾\static\images\底下並重新命名為 logo.jpg (附屬檔名按照影像的類型格式)。 - 建立
main.js於專案資料夾\static\scripts\底下,檔案內容維持空白。 - 建立
main.css於專案資料夾\static\styles\底下,檔案內容維持空白。 - 建立
.gitkeep於專案資料夾\public\assets底下,檔案內容維持空白。
12.3. 修改 settings.py 將 static 路徑寫入設定檔中
1 | # Static files (CSS, JavaScript, Images) |
STATIC_URL表示靜態檔案的路網址。STATIC_ROOT為當專案部署為正式站的時候,對應的靜態檔案路徑。STATICFILES_DIRS為當前專案的靜態檔案存放位置。
STATIC_ROOT實際上在開發環境(python manage.py runserver)時是沒有功能的,但是如果將專案託管於 Apache 或是 Nginx 伺服器時,會將靜態檔案的網址指向伺服器內某個資料夾路徑。伺服器在處理網址與路徑時根據資料安全的等級會限制使用者獲取特定資料夾內的資料,而靜態資料夾(public/*)存取權限相對寬鬆。
當部署到正式環境時,需要額外執行以下指令,彙整靜態檔案至指定資料夾內。
12.4 改寫 base.html 嘗試使用靜態檔案
1 |
|
- Line 8: 使用
{% load static %}模板語言宣告該頁面會使用到靜態檔案。 - Line 10: 使用
main.css靜態檔案。 - Line 11: 使用
main.js靜態檔案。 - Line 14: 使用靜態檔案的圖片。
測試方式

對著瀏覽器 Crtl + F12 進入
DevTools(以 Chrome 為例),切換到 Network 頁籤並按下 F5 重新整理,觀察main.js與main.css是否有載入(Status = 200),載入失敗的靜態檔案將會是以紅字 (Status = 404),而圖片則會直接顯示於頁面上。
13. 導入 Bootstrap 5 UI 框架
這一章節開始,將學習如何使用前端框架 Bootstrap 5 將版面進行美化。為了貼近實務這章節會開始大量編寫 template 模板,並適當的將區塊獨立成單一文件格式,即「切版」。接下來的實現過程較為繁瑣,再請注意檔案是否缺漏,否則會 Django 會拋出 templates not found 等異常狀態。
13.1. 下載 AdminLTE 4.0 Bootstrap5 框架
AdminLTE 4.0 是一套由 Bootstrap 5 為基礎的 UI 前端框架,在 https://adminlte.io 有完整頁面示範,提供我們快速開發網站 APP。該框架主要有兩個部分 css 與 javascript,要使用該 AdminLTE 框架,我們需要將 AdminLTE 所提供的程式碼拖曳至靜態資料夾按照類型存放。
新增檔案 adminlte.min.css 於 專案資料夾/static/styles/ 底下, 程式碼內容則將 Gist 的 adminlte.min.css 區塊內複製貼上。
新增檔案 adminlte.min.js 於 專案資料夾/static/scripts/ 底下, 程式碼內容則將 Gist 的 adminlte.min.js 區塊內複製貼上。
13.2. 建立 components
在 專案資料夾/templates/components 分別建立以下檔案,程式碼請參考下方內容:
1 | {% load static %} |
1 | {% load static %} |
1 | {% load static %} |
1 | <nav class="app-header navbar navbar-expand bg-body"> |
1 | <div class="app-content-header"> |
1 | <div class="row pb-3"> |
1 | <footer class="app-footer"> |
13.3. 修改 base.html 與其繼承頁面
一共三個頁面需要進行處理,分別是 base.html 以及繼承其模板的 index.html 及 post.html。
1 | <html> |
1 | {% extends 'scaffolds/base.html' %} |
1 | {% extends 'scaffolds/base.html' %} |
13.4. 調整 AdminLTE 的 CSS
這邊採用 AdminLTE 的 Card 作為顯示文章的框架,但是 Card Title 的字體大小不夠明顯,我們可以修改 static/styles/main.css 達到我們想要的字體大小。
1 | .card-title { |
13.5. 整體完成效果
14. 過濾器 (filter)
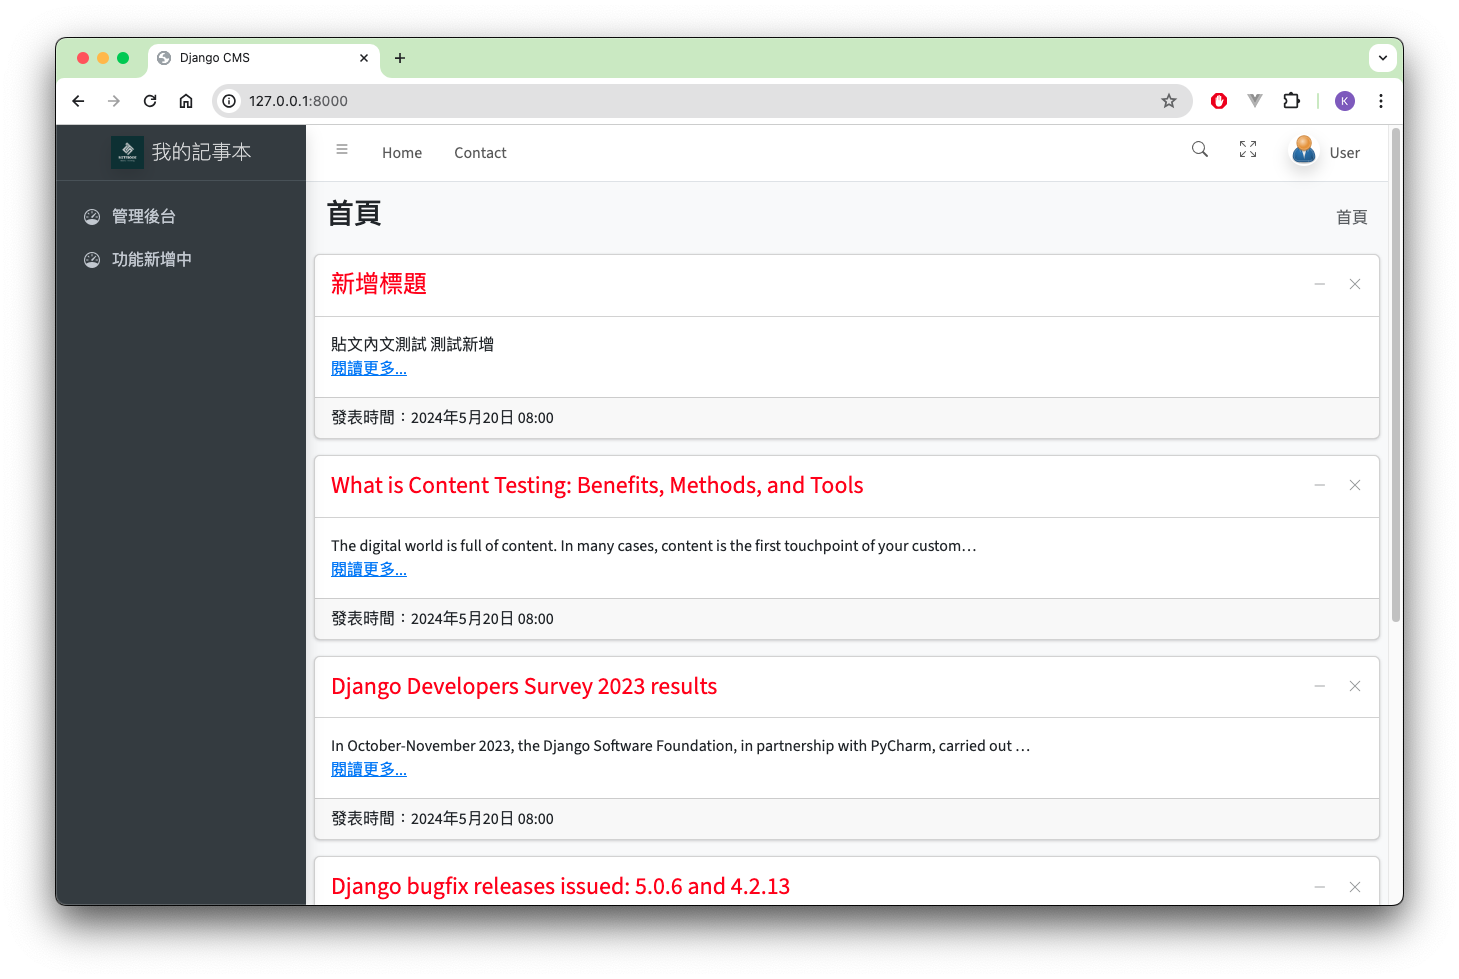
從上一個章節的結果觀察,目前的版面在首頁會一次性把文章內容全部渲染,就如同之前章節所提,作為首頁會希望貼文僅顯示部分內容,盡可能再不捲動畫面的狀態下,顯示多筆貼文。
此時,我們可以使用模板的過濾器 (filter) 進行截斷。語法範例如下 :
1 | {% data | [filter_command] %} |
- data 為渲染的資料。
- filter_command 部分為欲使用的過濾器指令與參數,如果要使用複數過濾器時使用
|進行串接。 - 查詢更多使用範例與內建指令 https://docs.djangoproject.com/en/5.0/ref/templates/builtins/#built-in-filter-reference
14.1. 使用 filter 截斷貼文中多餘的字元
修改 專案資料夾\templates\components\article.card.html 檔案中 <div class="card-body">標籤內容:
1 | <!-- ... (略) ... --> |
- 用模板語言
{% if %}判斷參數showReadMore變數值。 {{ post.content | truncatechars:100 }}在渲染資料處加上過濾器truncatechars。truncatechars:100過濾器為刪除資料第 100 字元之後的字串進行渲染。- 過濾器指令與參數用
:區隔,但參數前面不得有空白字元存在。
而 專案資料夾\templates\pages\index.html 中
1 | {% include "components/article.card.html" with post=post showReadMore=True %} |
需要在 {% include "components/article.card.html" %} 用 with 加上 showReadMore 變數與資料。同樣要注意變數與資料間不得有空白字元存在,但使用 = 將變數與值區隔開來。
套用 Filter 的渲染結果
14.2. Filter 的 linebreaks 功能
在先前新增貼文時,透過 Django 內建後台進行新增,如果資料有使用斷行處理時,資料會將斷行字元轉換成 \n 進行儲存,而將資料渲染時 HTML 會將 \n 以空白字元進行處理,畫面結果如下圖: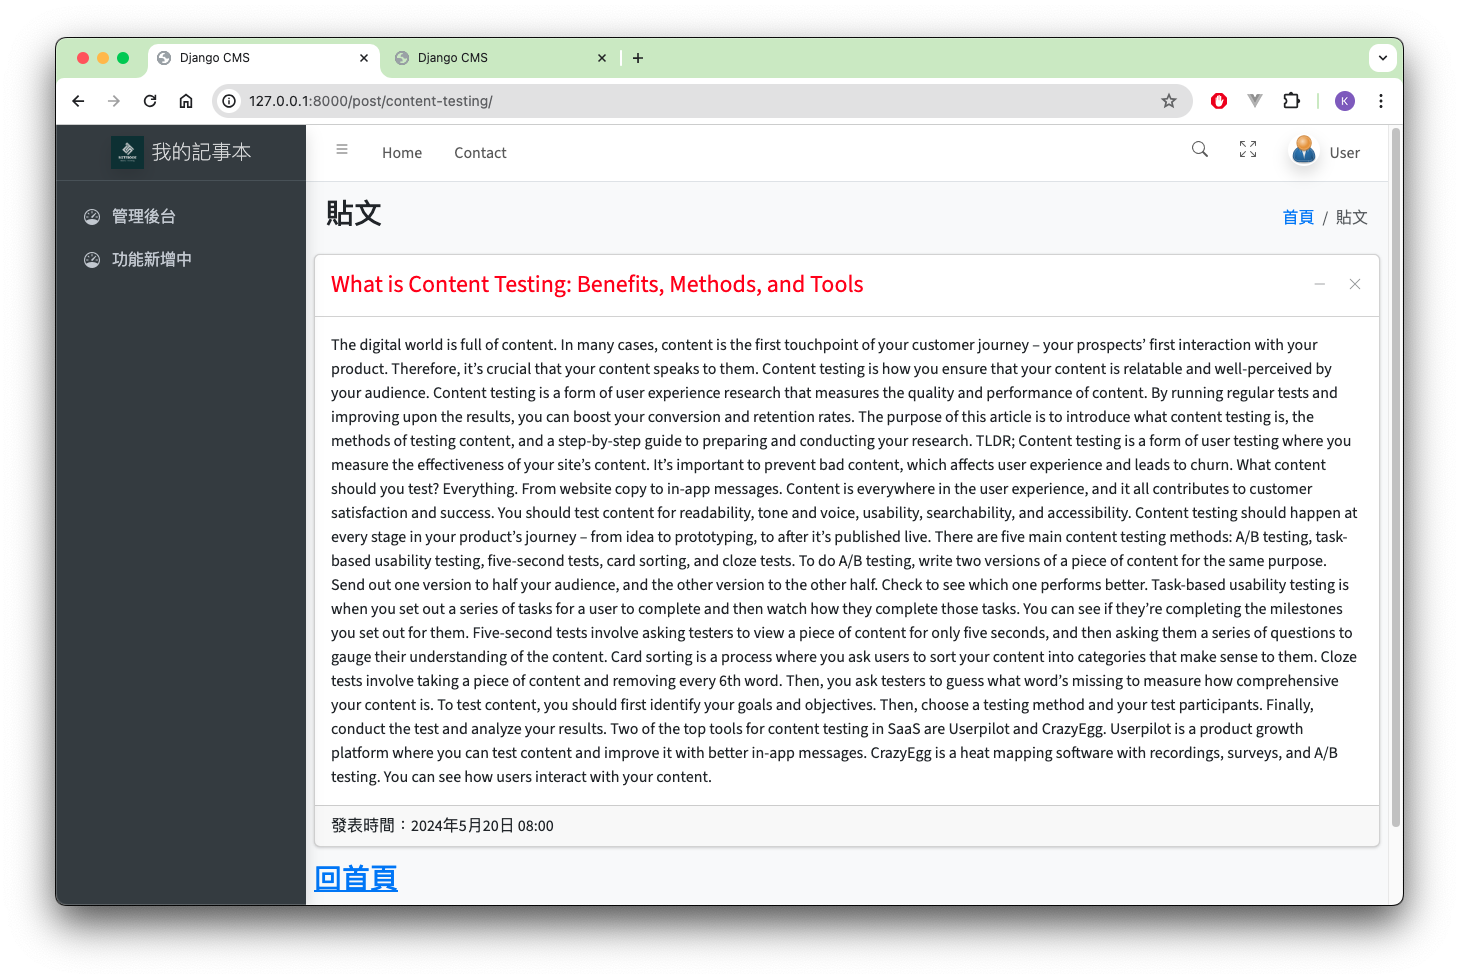
我可以過 filter 中的 linebreaks 將 \n 轉換成 <br>,轉換後畫面如下: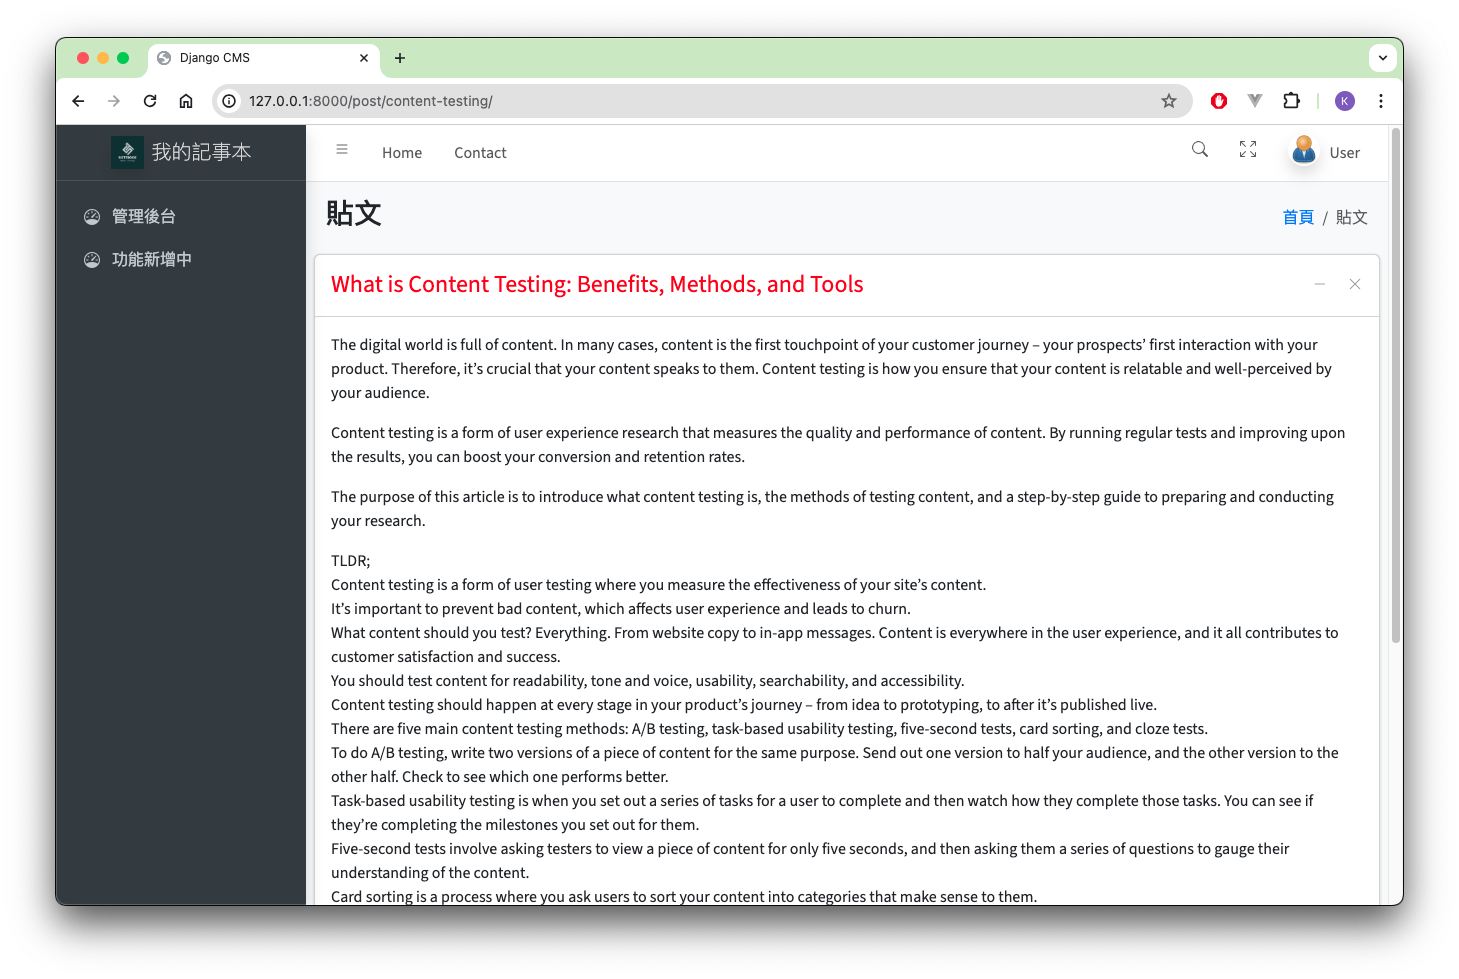
修改 專案資料夾\templates\components\article.card.html:
1 | <!-- ... (略) ... --> |
- 程式碼僅需要在
{{ post.content }}加上linebreaks過濾器。
14.3. 讓貼文內容可以顯示 HTML 語法
請先登入後台並新增一篇貼文,內容如下:
Title:
Show HTML ImageSlug:
dispaly-html-with-imgContent:
1
2
3
4<blockquote class="imgur-embed-pub" lang="en" data-id="a/oFFsavC" data-context="false">
<a href="//imgur.com/a/oFFsavC"></a>
</blockquote>
<script async src="//s.imgur.com/min/embed.js" charset="utf-8"></script>
回到首頁並展開 Show HTML Image 貼文頁面中。
Show HTML Image 貼文
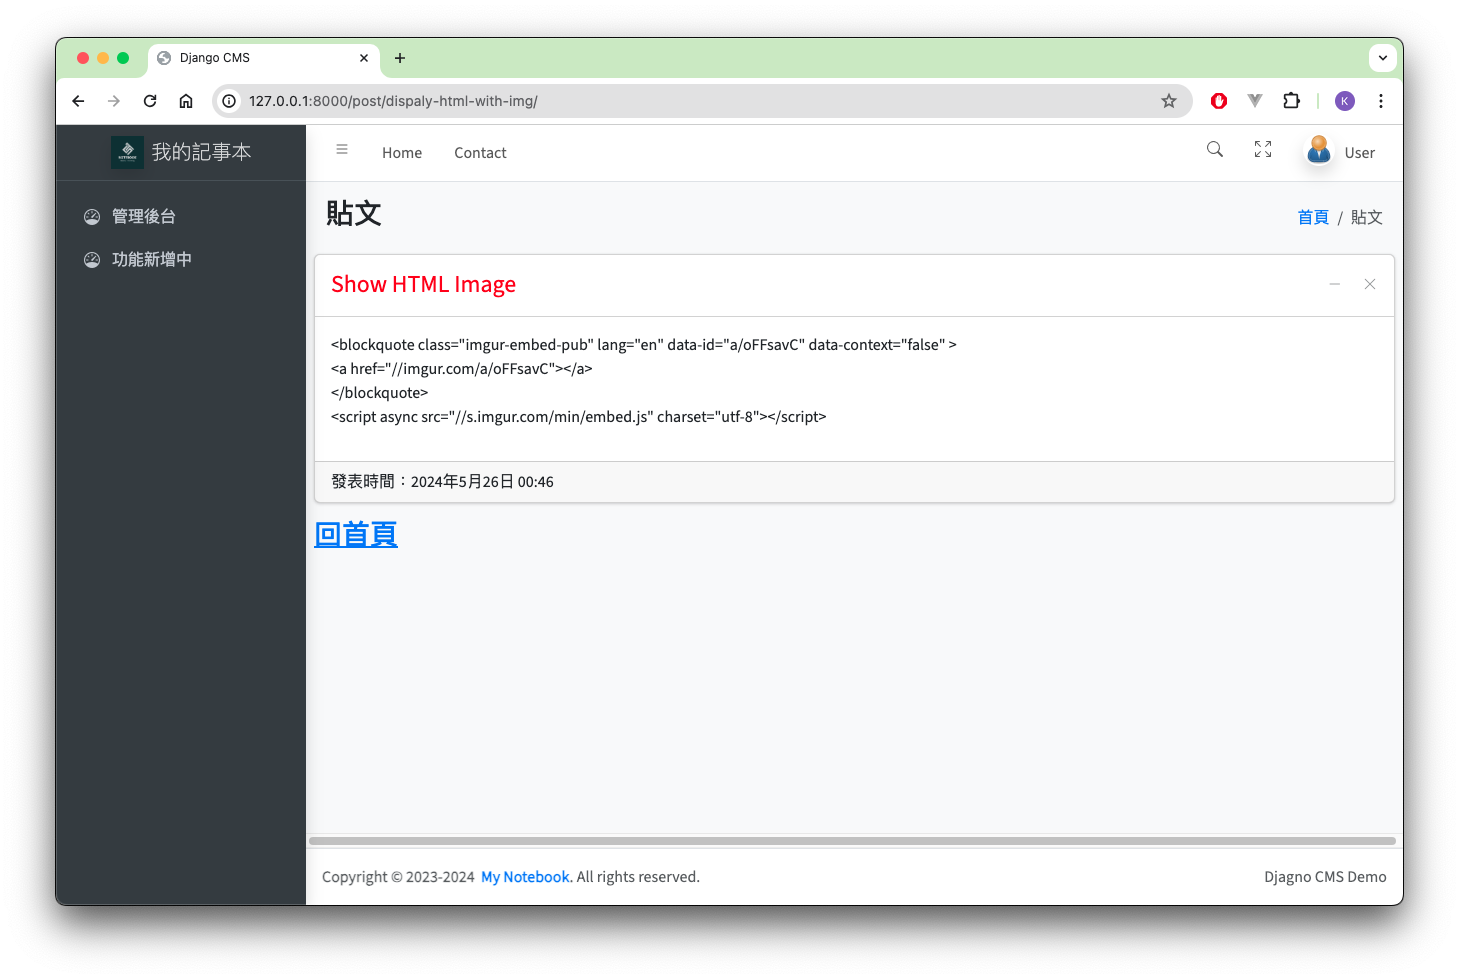
從渲染畫面結果顯示可以發現,程式碼片段在渲染過程中以字串的形式呈現,在安全性考量下 Django Template 引擎在渲染會先將資料以字串型態進行儲存,避免資料內嵌有惡意程式碼。因此如果要渲染帶有程式碼的資料時,需要加上過濾器 safe 表示這段資料的程式碼內容是安全的。
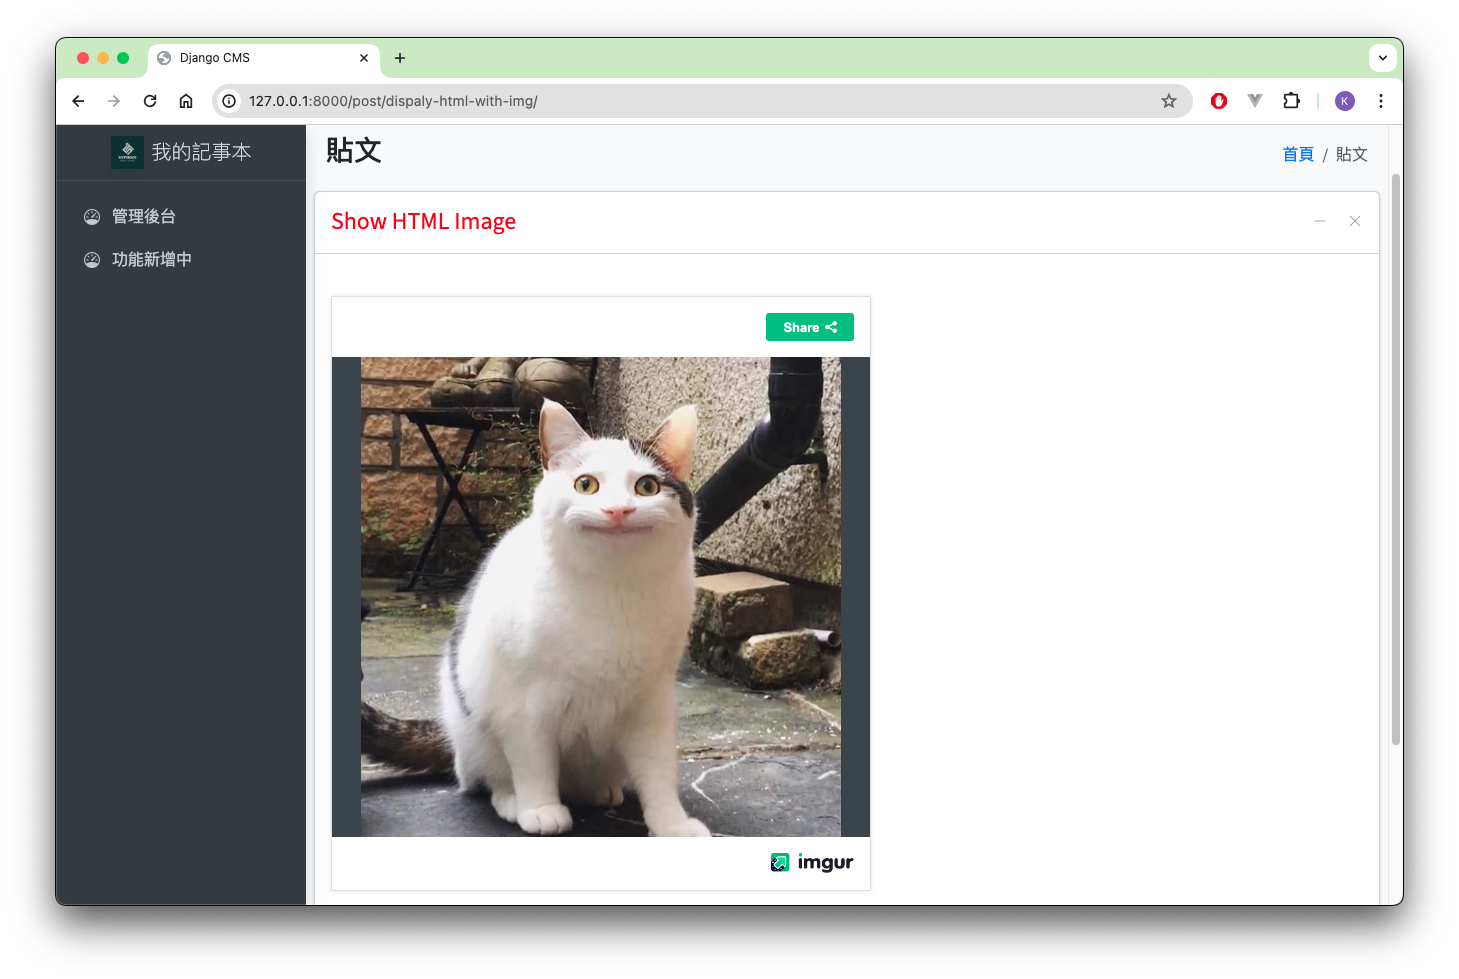
修改 專案資料夾\templates\components\article.card.html:
1 | <!-- ... (略) ... --> |
帶有 safe 過濾器的渲染結果
為何 Django 需要設計這個安全機制
例如在貼文內容加上這段程式碼後,只要展開貼文內容,就會將網站重新轉址至目標網站。
1 | <script>document.location.href="https://keoinn.github.io";</script> |
14.4. 自訂過濾器渲染 Markdown 語法
如同上個章節的步驟,請先登入後台並新增一篇貼文,內容如下:
- Title:
Show Markdown Content - Slug:
dispaly-markdown-content - Content: https://gist.github.com/keoinn/25dabbce74b2d417375805e9e0ec1501
回到首頁並展開Show HTML Image貼文頁面中。
Show Markdown Content 貼文
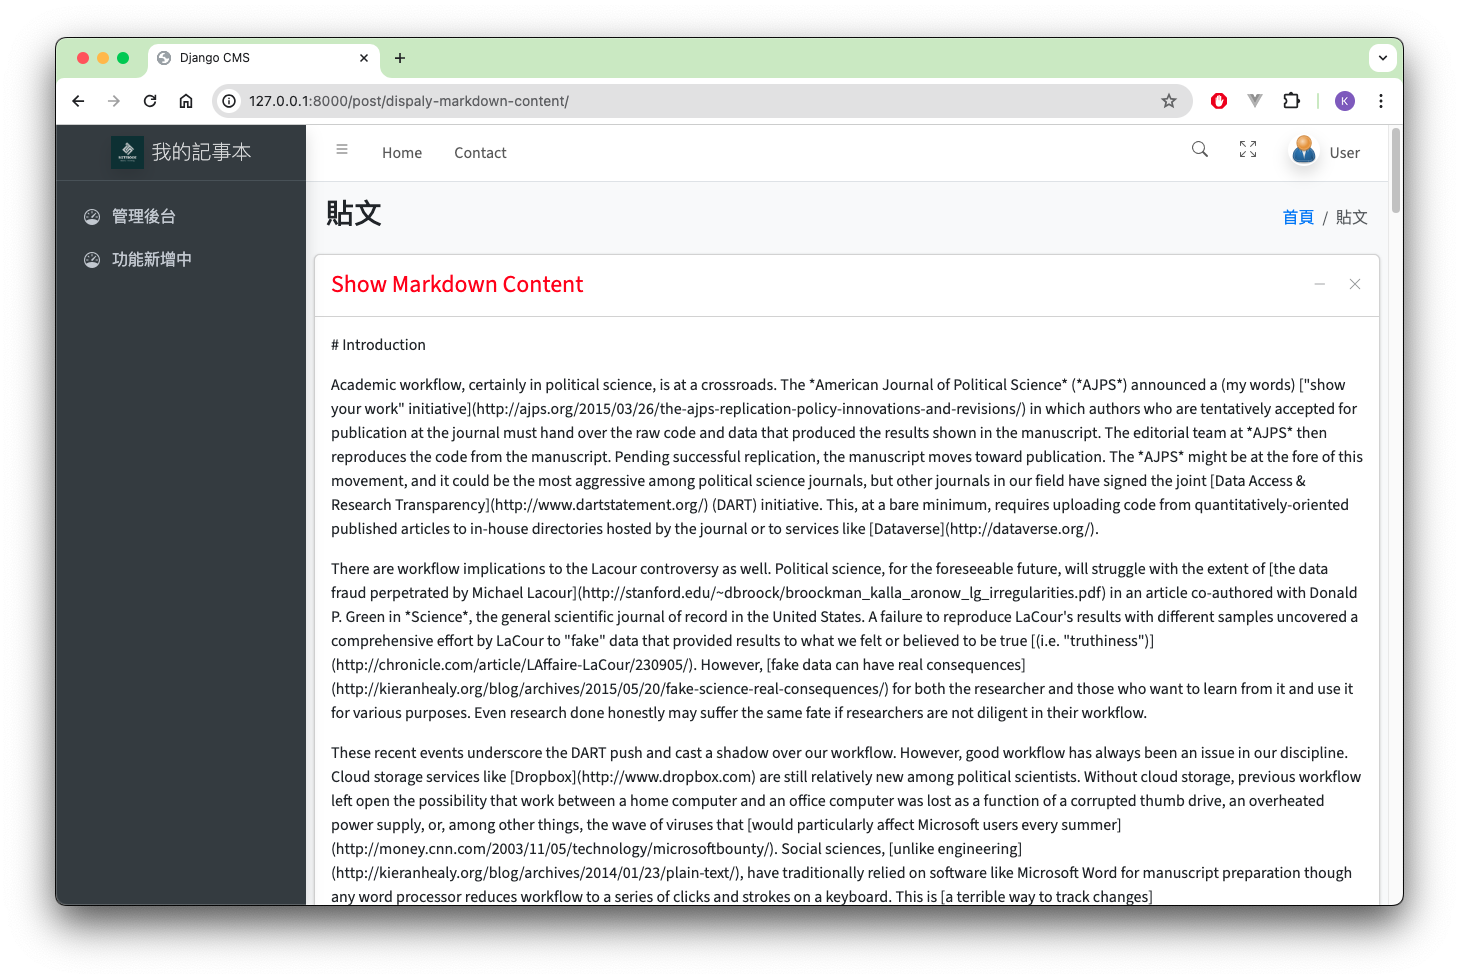
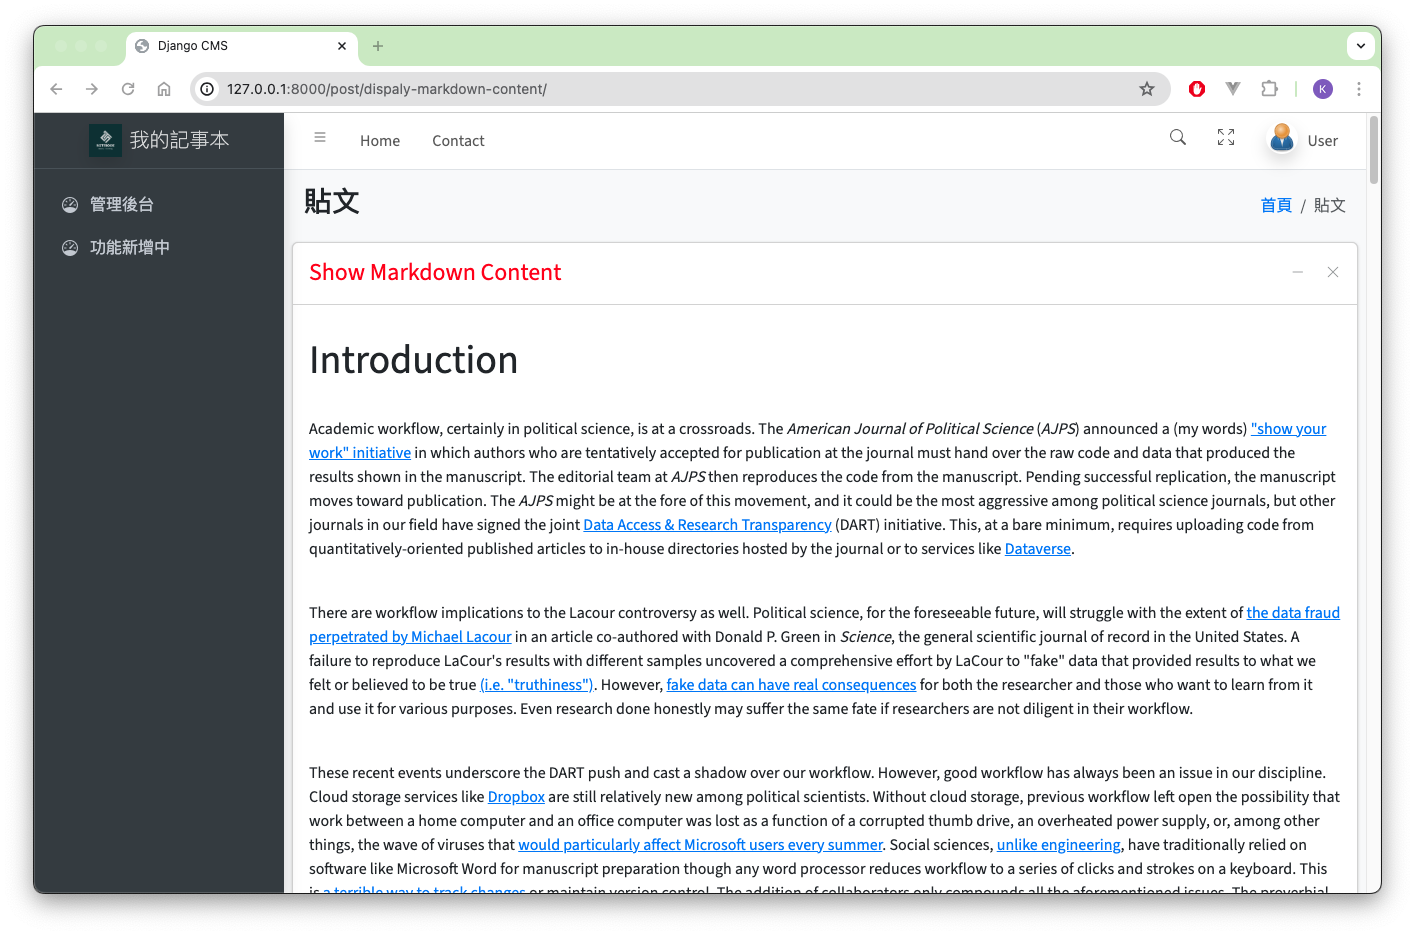
先前的步驟裡,貼文如果是 HTML 語法與 JavaScript 程式碼可以透過 safe 標籤允許 Django Templates 引擎渲染顯示,但是如果是特定語法的 Markdown 標籤時,就需要自定義渲染規則與標籤。實現步驟如下:
注意
- 記得進入虛擬環境執行程式碼,即命令提示字元前面需要出現
(django_env)。 - 如果測試伺服器是正在運行的狀態,安裝套件錢記得先停止伺服器,使用 Ctrl + C 終止程式。
1 | pip install markdown |
在專案資料夾底下透過以下指令建立資料夾,libraries 與 templates 在同一個層級。接著在 libraries 底下建立 filter 資料夾。
1 | mkdir libraries |
1 | from django import template |
1 | TEMPLATES = [ ## 約 55 行處 |
1 | <!-- ...(略)... --> |
15. 專案部署準備
最後一個部分,再完成專案後要準備部署所使用的環境與程式碼。並撰寫簡單的部署指令,之後可以利用第三方工具實現自動化部署。
15.1. PIP Requirement List
將專案部署於伺服器上,需要設定與安裝執行環境,例如:我們這個專案執行於 Django 4.2 Package、Markdown 3.6 這些套件資訊可以在開發環境將套件資訊與版本號碼進行打包,在部署環境時可以透過打包資訊一次性安裝相依套件,而不再是一行一行指令進行安裝。因此我們可以使用 pip 指令進行打包並將資訊記錄於 requirments.txt。
1 | pip freeze > requirements.txt |
您需要知道
同樣地在執行紀錄套件資訊與版本號碼階段,要進入 Python 虛擬環境,否則紀錄的套件版本資訊將會是當前環境的資訊,在部署階段可能會發生 module not found 等問題。
透過以下指令進行一次性安裝 (同樣需要注意當前的虛擬環境):
1 | pip install -r requirements.txt |
requirements.txt 套件資訊輸出結果參考
1 | asgiref==3.8.1 |
15.2. 編寫 wsgi.py 檔案
接下來將會把專案託管於 Apache 透過 WSGI (Web Server Gateway Interface) module 處理 Djagno Framework 的請求,而 WSGI 則會處理 Web Request 並與 Python Application 執行與通訊。
先決條件
- 伺服器租用 GCP VM。
- 用自己的 Google 帳號租用虛擬機 (用自己的帳號租用時,會在虛擬機自動建立名為自己帳號的資料夾作為個人資料夾)。
- 專案部署於個人資料夾底下。
- Python 虛擬環境名稱為 django_env,且 Python 版本為 3.12。
1 | import os |
(GCP帳號) 請替換成自己的帳號即 Gmail 地址移除 (@gmail.com) 部分。
15.3. 上傳 db.sqlite3 至雲端服務
一般來說我們會把資料庫跟專案區分開來。實務上也會根據將資料庫獨立於專案之外,最常見的例子就是獨立建置資料庫伺服器,連線方式則使用 socket 進行連接。在這架構之下也容易實現資料鏡像備份,進行測試時只需替換資料庫連結地址,將正式站與測試站資料區隔。而教學文章中採用 sqlite3 作為資料庫的儲存軟體,又該資料庫是以檔案方式進行儲存,我們可以將資料庫的檔案上傳至雲端儲存空間進行備援。
1 | python-upload@key-component-424608-b2.iam.gserviceaccount.com |
15.4. 建立 Git 版控資訊並存儲至 Github
在專案資料夾下建立 .gitignore 讓暫存檔案與資料庫不進行版本追蹤。
.gitignore 程式碼
1 | # Django # |
